How to Install Language Packs in Compiere ERP?
Learn how to install an existing Compiere ERP Language Pack or even create your own. A Language Pack is a collection of XML files containing the translations for a given language. Many of our Language Packs are available through the Compiere Exchange.
Note: Language Packs are version independent. If you apply an older language pack to a newer release of Compiere some of the newer items may remain untranslated.
Installing a Language Pack
Prepare for Installation
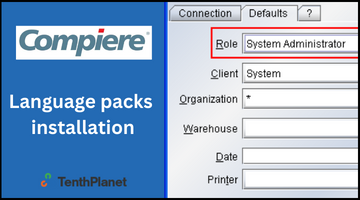
Log in to Compiere with the System Administrator Role. In the “Language” Window search for your language then enable “System Language” and start Language Maintenance. Select “Add missing Translations”. This copies the English words into the translation areas.
Import the Translation
The Language Pack distribution is usually a zip file. Extract it to any directory – the default directory is COMPIERE_HOME/data (e.g.: C:\Compiere2\data) , but it can be anywhere. The files have the format of <table name>_Trl_<language>.xml. Note that the language should be the same as activated in the preparation step (fr_FR is not the same as fr_CA). Example file name: AD_Element_Trl_fr_FR.xml
Log into Compiere with the System Administrator Role. In the “Translation Import/Export” Window leave the “Tenant” and “Table” selections empty and select your language. Click on “Import” and select the directory where the XML files reside. The translation is now applied to your system.
Language Pack Terminology Responsibility Please note that we as the Compiere team only provide the translation technology. If you are not happy with the terminology, please contact the vendor/creator of the Language Pack directly.
Creating a new Language Pack
Preparation
Compiere’s base language is US English (en_US). The naming conventions are based Java locale identifiers. The “language” English UK uses the base English language, but uses the UK date format dd/MM/yy. The example used here is Français in France (fr_FR).
With the System Administrator role start the Workflow “Language Setup” or start the “Language” Window and add the new language as a System Language (example: Language=fr_FR, Name=Français).
Start the “Verify Translation” process in the “Language” Window to create entries for the new language. Missing translations are copied from the base language (en_US).
Code Modification
As the next step, you need to modify the class org.compiere.util.Language. This is required since when you first start the client the database and available languages are unknown.
- Locate the Languages static array and add the line: new Language (“Français”, “fr_FR”, Locale.FRANCE, null, null); If you set the last two parameters to null, the default for the decimal point and date format are derived from the locale. If the Java Runtime system does not have a predefined locale (LocaleFRANCE in the example), you need to define the two parameters.
In the “tenant”, “dbPort” and “install” modules – copy and translate the files:
- org.compiere.apps.ALoginRes.java ==> ALoginRes_fr.java (login screen)
- org.compiere.db.DBRes.java ==> DBRes_fr.java (connection screen)
- org.compiere.install.SetupRes ==> SetupRes_fr.java (server setup)
- org.compiere.plaf.PlafRes.java ==> PlafRes_fr.java (user interface option screen)
- org.compiere.util.IniRes.java ==> IniRes_fr.java (license dialog)
These screens are displayed before connecting to the database to get the translation.
Recompile the “tenant”, “dbPort” and “install” projects. If your language is not using the Latin-1 character set, you need to explicitly convert your local character set to ASCII; Examples for Cyrillic and Thai: native2ascii -encoding Cp1251 ALoginRes_bg.local ALoginRes_bg.java native2ascii -encoding MS874 ALoginRes_th.local ALoginRes_th.java For details see the documentation for Java internationalization and native2ascii.
Database Translation Start the Compiere application. In Preferences (e.g. in the “Menu” window via File > Preferences) select “Show Translation”.
In the System Administrator Role in the “Language” Window, add your language as System Language and select “Verify Languages”.
Follow the Workflow “Language Setup” to translate the different elements. Please note that if you translate a term in the “Element” Window, all Fields and Parameters are translated as well, if they are centrally maintained. After translating the “Window,” “Process,” “Tasks” and “Workflow” Windows, run the process “Synchronize Terminology” to indirectly translate the Menu.
Suggested translation sequence of main components (follow “Translation” Workflow):
- Element
- Window, Tab
- Process
- Reference (List)
File Translation As an alternative to a translation in the database, you can export the translation into an XML file and then translate it with professional translation tools (translation tools allow tag protection, so that you only modify the translation).
Procedure To export the files, run RUN_TrlExport in the “utils” directory. The file exports the German (de_DE) translation in the standard directory data/de_DE. Just modify the AD_LANGUAGE variable. Only records not centrally maintained are exported. If the language and translation does not exist in the database, it is created.
To import the translated files, execute RUN_TrlImport (after changing the AD_LANGUAGE variable). If the language and translation does not exist in the database, it is created.
As an alternative to this Batch procedure, you can start the “Translation Import/Export” Window in the System Administrator role.
Effective Translation
Translation is an ongoing project as new or changed elements need to be translated. Consequently, you ideally need to be able to automatically translate the material. There are lot of translation tools available, which decrease the effort tremendously and also ensure consistent translation.
Your general procedure looks like this:
- Create your Glossary – here you define the terminology and their translation, e.g. “Account = Konto”. The more time you spend here, the better your translation quality. There are tools to extract the terminology, and the AD_Element is the ideal basis for this.
- Translate the files – based on the suggested initial (raw) automatic translation. While you are translating, it builds your “translation memory”, so that the same and similar phrases are translated automatically.
- Updates are now easy – you run the new/changed file against your translation memory and you are only prompted for new constructs.
Distribution
Create a zip file with your translations and the modified RUN_TrlImport for your language. You can add the translations in CVS and publicly share it, or sell it to recover the cost of your translation effort.
Get in Touch with TenthPlanet, If you are looking for Compiere ERP support services.
