Creating a web-to-lead form in Salesforce

A web-to-lead form is an essential component of marketing and sales automation. Its purpose is to capture data submitted by website visitors like contact information, product interest and store it as a “Lead” record in Salesforce Sales Cloud.
Follow the below steps to create “Web-to-lead” form and also to publish the form in your website.
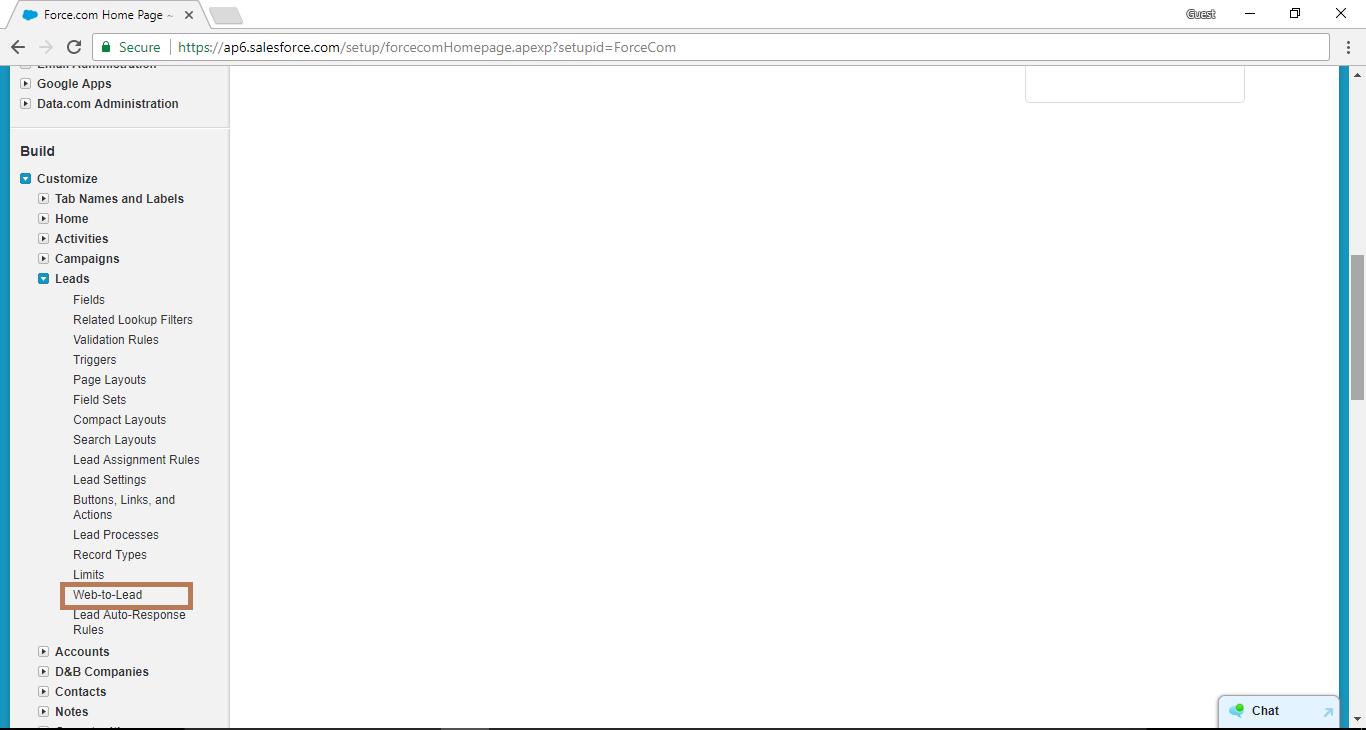
Step-1. Go to Setup->Customize->Leads-> click on web-to-lead.

Step-2. It displays the below screen

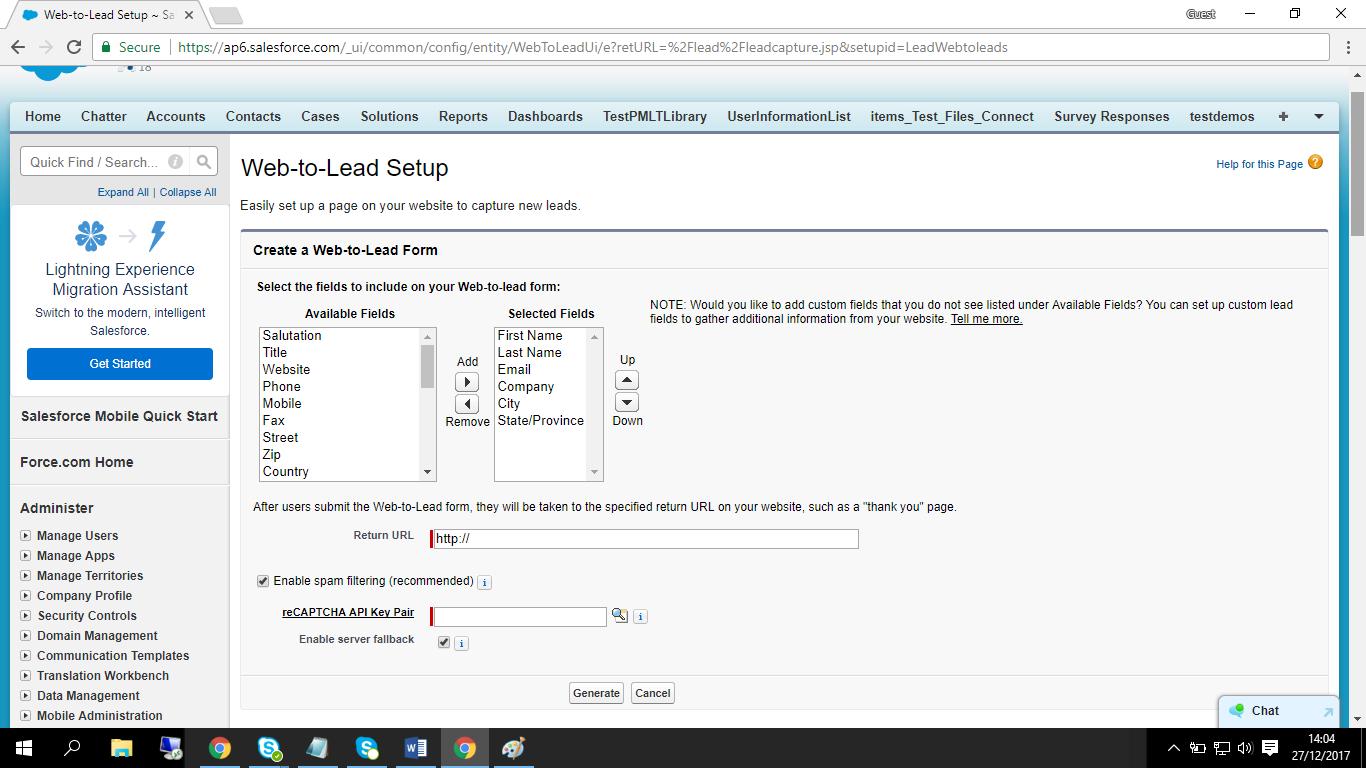
Step-3. Click on “Create web-to-lead form” button then it will navigate to the following screen

Step-4: It display the list of fields to display on the web to lead form including custom fields from lead object. Also you can add or remove fields using ‘Add’ and ‘Remove’ buttons. And reorder the fields by using ‘Up’ and ‘Down’ buttons.
Step-5: Now click on the ‘Generate’ button it will navigate to the below screen

Step-6: Salesforce creates HTML code, using this code we can customize these codes based on our requirement. Once the customization completed we can place this code into our website
